Batteries and Parts
EPEAT 4.4.1.1 - Three year repair & Replacement service
Transource provides repair and replacement services for all Transource purchased EPEAT-registered products for at least three years from the date of sale. These services can be accessed through our customer support services via email or phone.
- Call Transource's IT department (Toll-Free: (888) 544-5120) and provided either, sales order number, serial number or customer information such as phone number, address, and date of purchase.
- Email our IT department at [email protected] and provide the above information.
EPEAT 4.4.2.3 - Spare Parts:
Customers who purchased Transource EPEAT-registered products can buy specific compatible spare parts, for up to one year after the product is discontinued. This helps extend the product’s lifespan. Some examples of spare parts include:
- Small Form Factor PC: keyboard, storage, memory, power supply or power cord
- Mid tower PC: keyboard, mass storage device (selected models), memory, power supply, or power cord
- Workstation: keyboard, mass storage device (selected models), memory, power supply, or power cord
To order spare parts for your PC you can
- Call Transource's IT department (Toll-Free: (888) 544-5120) and provided either, sales order number, serial number or customer information such as phone number, address, and date of purchase.
- Email our IT department at [email protected] and provide the above information.
EPEAT 4.4.2.4 Required-Battery replacement and information:
Transource offers battery repair and replacement for all notebooks, irrespective of whether the product is out of warranty. Choose the service and repair option that's best for you.
- Call Transource's IT department (Toll-Free: (888) 544-5120) and provided either, sales order number, serial number or customer information such as phone number, address, and date of purchase.
- Email our IT department at [email protected] and provide the above information.
How to remove laptop battery instructions.
Criterion 4.3.1.1 Identification of materials & components requiring selective treatment
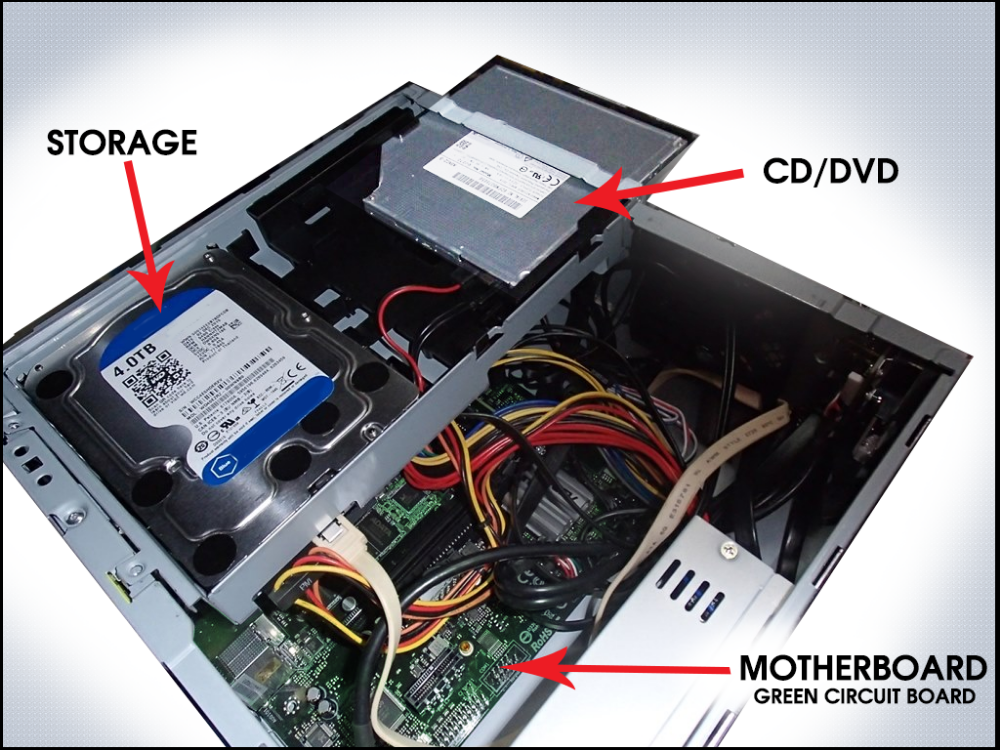
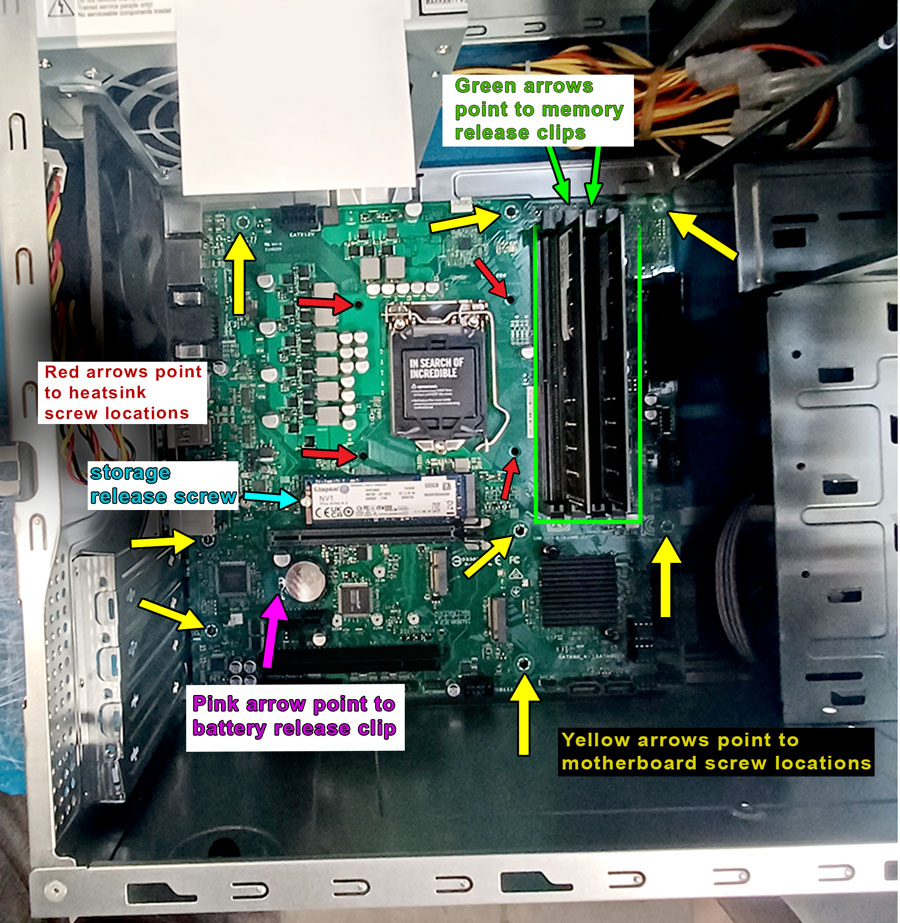
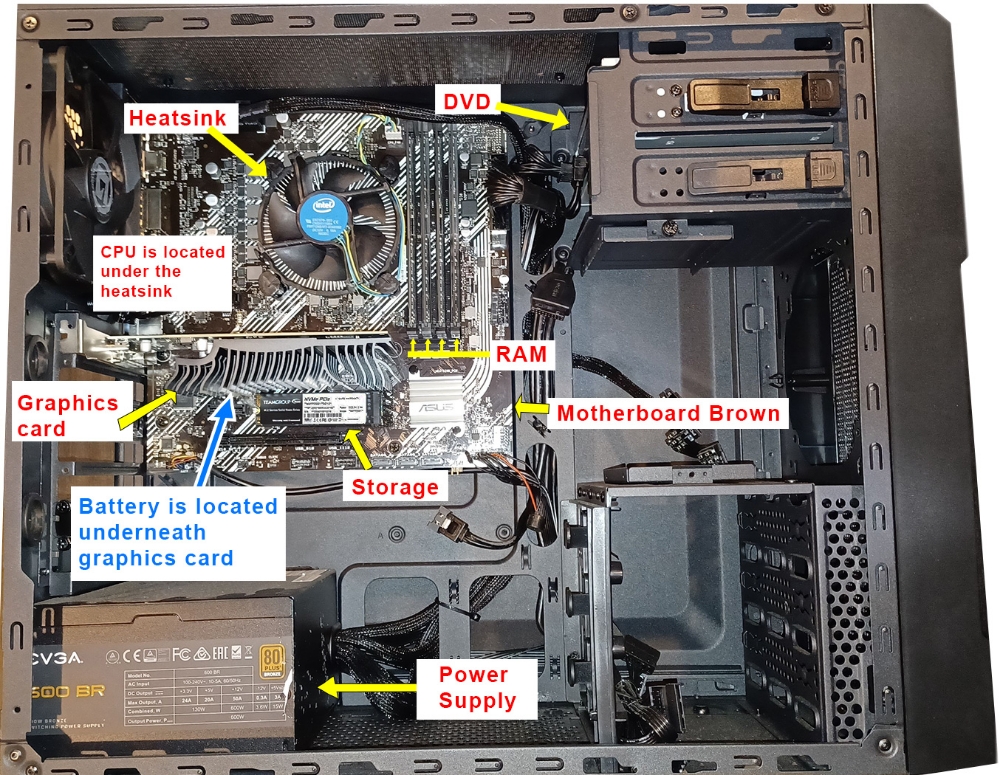
Printed Circuit Board Locations:
One Motherboard = Center of Chassis
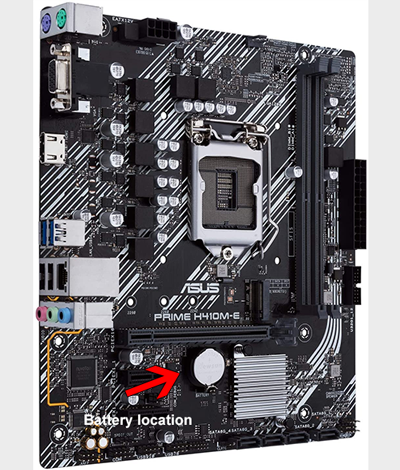
One PC battery = Right middle of motherboard
One Power Supply= Bottom of Chassis
One or more RAM = Actual part
One Hard Drive = Inside the HD
One M.2 = Actual part
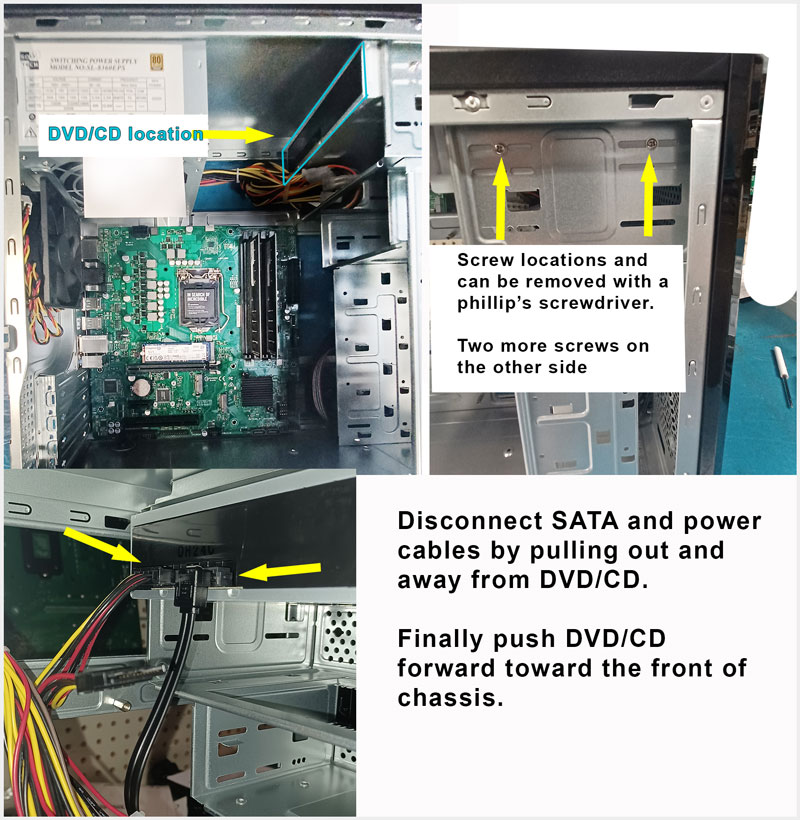
CD/DVD = actual part front of chassis.
Not all units may have hard drive and/or CD/DVD
Plastics with Brominated Flame Retardants = May be Present
External Electrical Cable = Power Cable (plugs into of device)
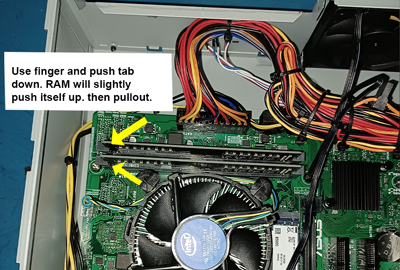
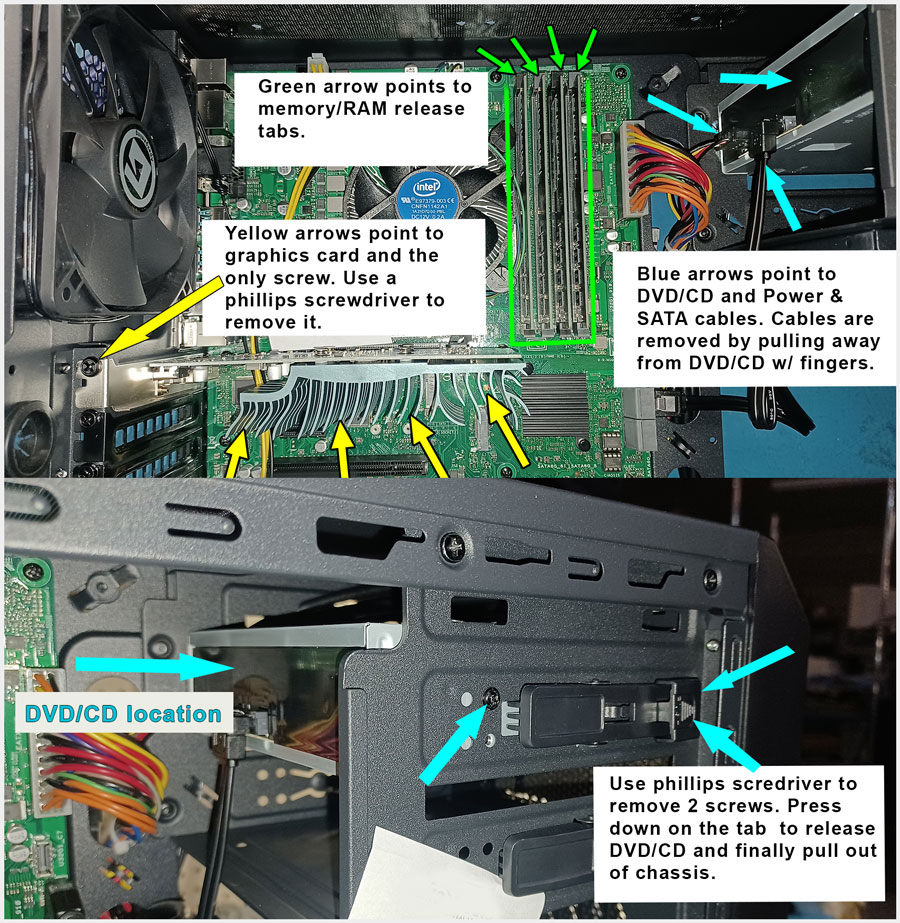
RAM Removal (memory card exceeds 10cm^2) - Remove the memory card by pushing down on the tab (yellow arrows point to tab) and pull then pull the card out. This system shows two memory cards installed.
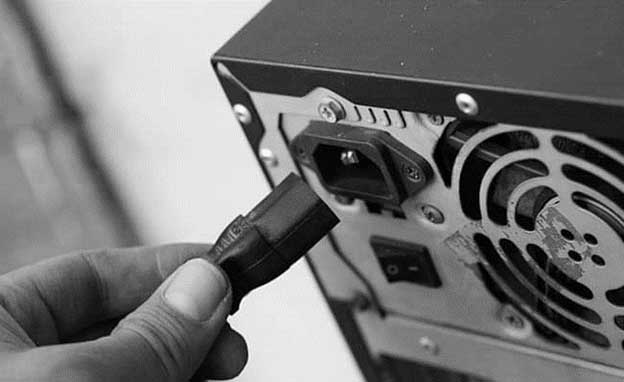
External cable removal - How to unplug-remove external cable from back of PC. Using your fingers remove external cable from the rear of the PC by pulling cable away from the chassis.
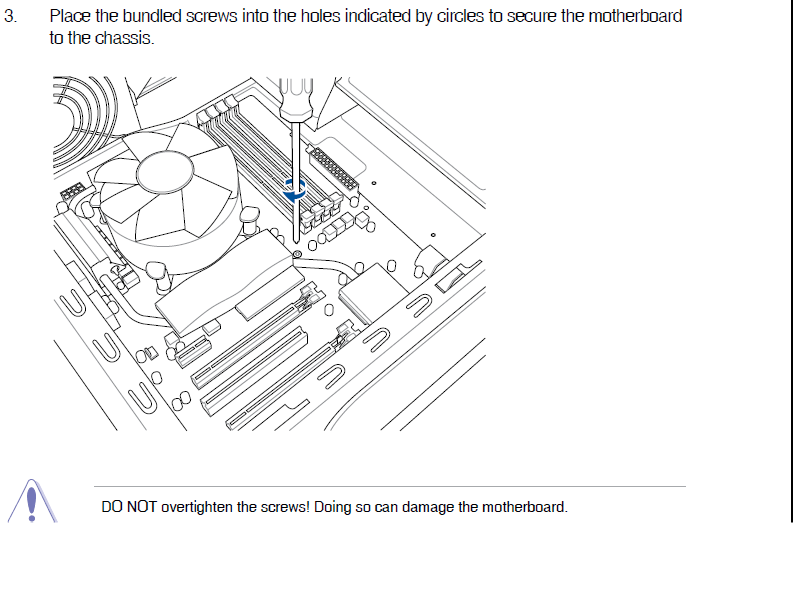
Motherboard installation & removal

B2000S components
NOTE: CD/DVD (B2000S) contains PC board larger than 10cm^2.
(Image 1)
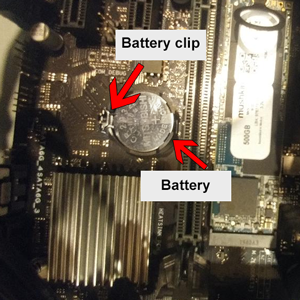
The motherboard in the B2000S contains a Lithium-Ion battery that must be removed during recycling. The battery is clipped onto motherboard (see image 1). The battery can be removed by releasing the clip on one side, which will allow the battery to pop out. No special tools required other than fingernail or small screwdriver.
Storage
(Image 2)
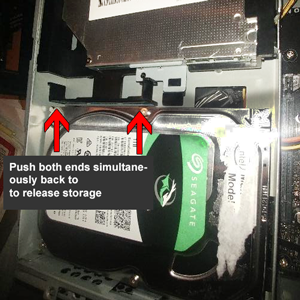
The drive will either be an onboard M.2 drive, hard drive or both. The hard drive is removed by pushing the two plastic ends away from the drive (image 2). The M.2 is removed by pulling up on the plastic black ring (image 3). None of the storage devices are permanently soldered to the motherboard.
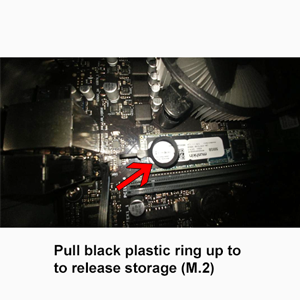
(Image 3)
Motherboard with location of battery:
Component locations for B2000M & B3000M
Using your fingers pushdown on the gray tab to release memory/RAM.
Follow component removal instructions as stated above in B2000S PC.
DVD/CD location and removal for B2000M & B3000M
NOTE: CD/DVD (B2000M & B3000M) contains PC board larger than 10cm^2.
Follow component removal instructions as stated above in B2000S PC.
------------------------Scorch 1050 & Scorch 2050 -----------------------------------
Component locations for Scorch 1050 & Scorch 2050
Plastics with brominated flame retardants may be present.
Removal instructions (below) for SCO-1050 & SCO-2050. Removal instructions are
the same wether the motherboard is green or brown in color.
Battery is located underneath the graphics card. Remove battery by pressing on the clip and pull the battery out.
Unplug the CPU fan power connector (yellow, brown, blue etc. wires) from the motherboard.
Locate the four posts that surround the CPU fan (circled in red). See below.
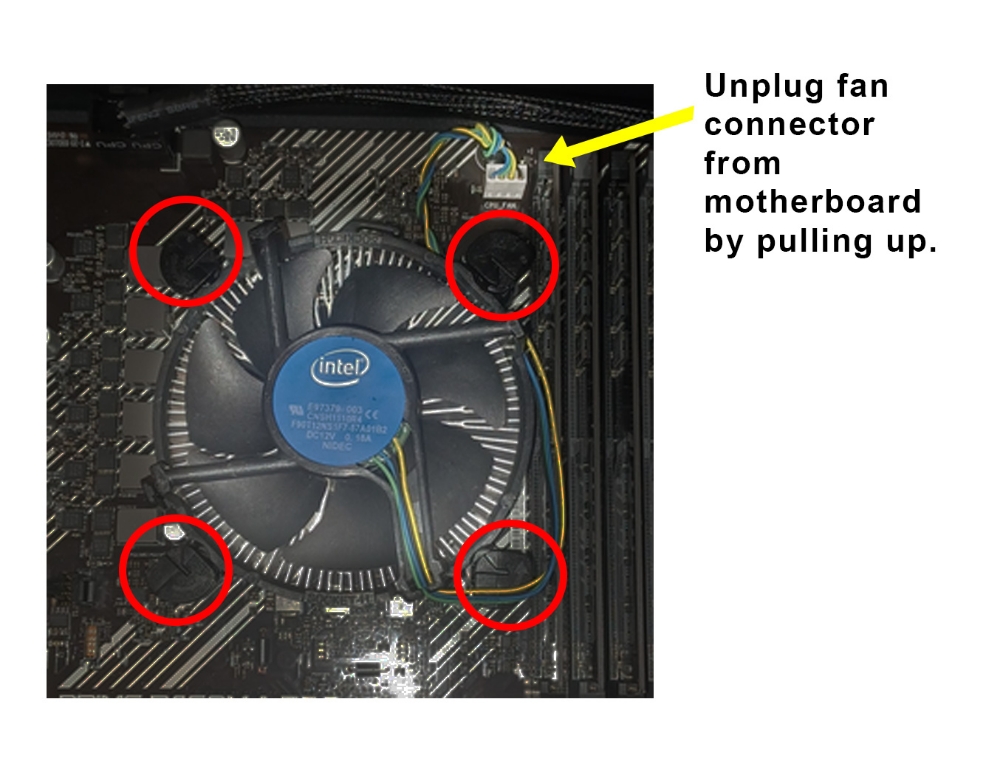
Turn each post one quarter turn to the left.
Lift each post up until it pops & finally lift entire fan assembly from motherboard.
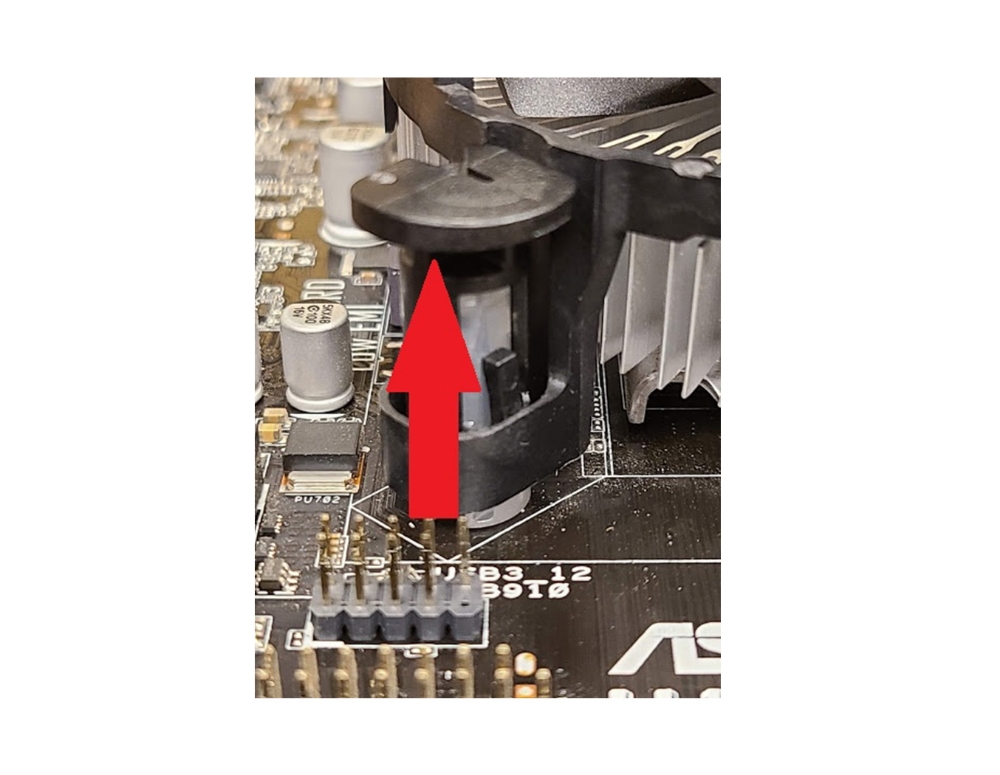
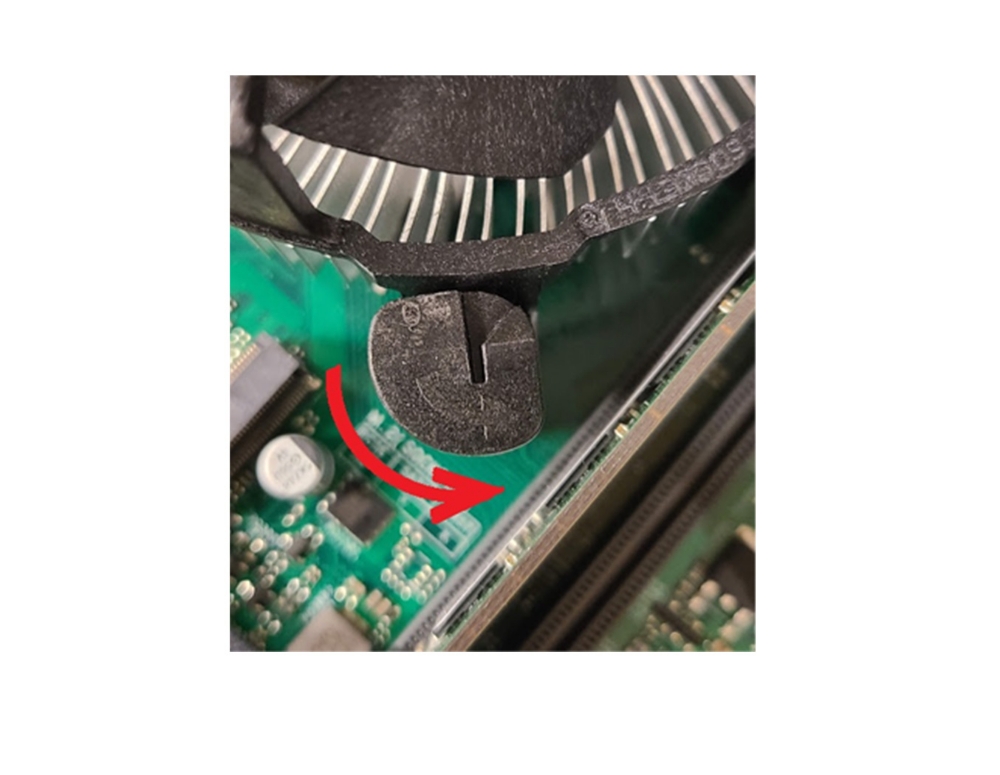
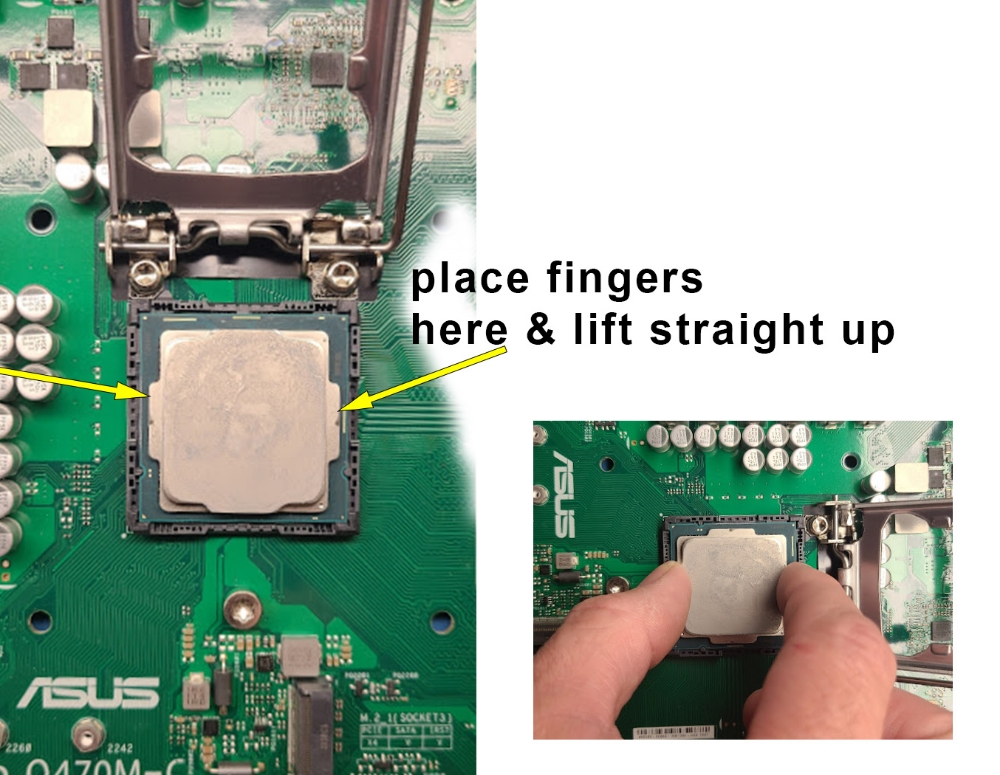
Process to remove the CPU. Caution do not use any tools or run the risk of damage to CPU.
Press down and away from the CPU to release the lever holding CPU inplace.
Detail instructions to remove CPU: push latch down and while maintaining pressure push on the latch
away from the CPU and then continue to maintain pressure as you slowly allow the latch to come up.
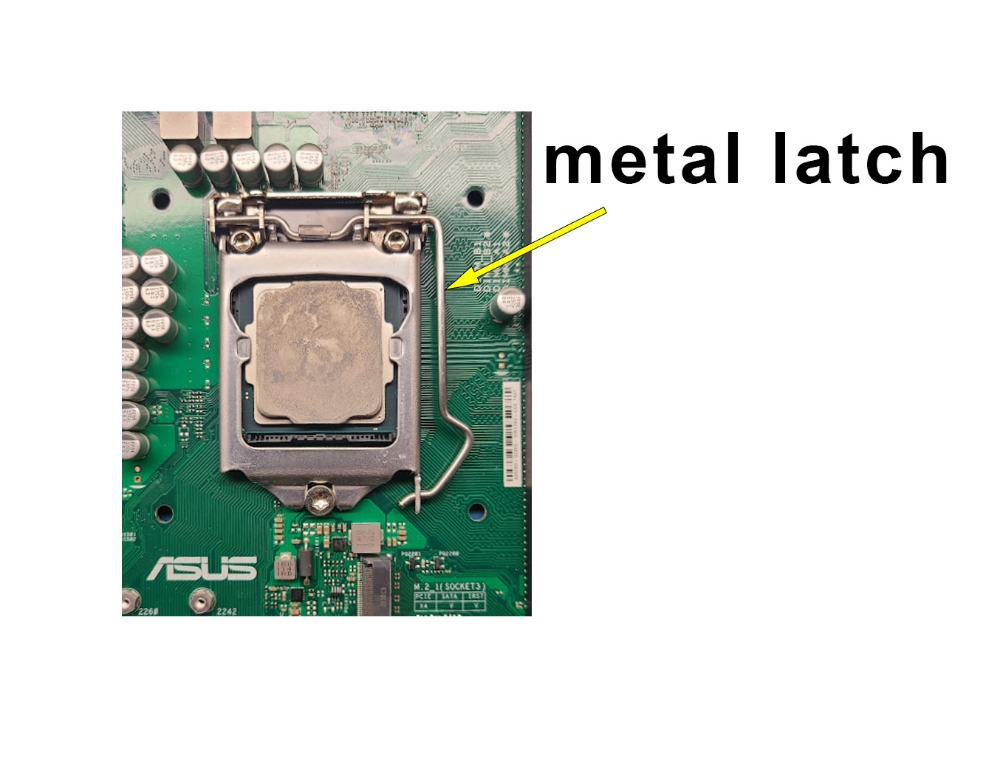
Once the latch is up, gently using your fingers pull the CPU up and out.
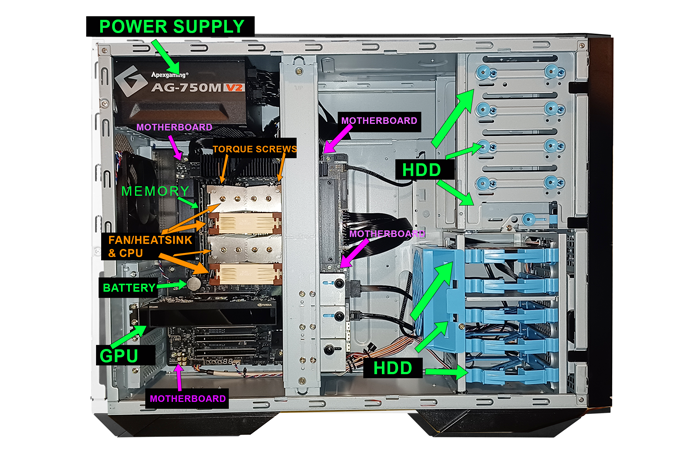
Removal instructions for other components are deatailed in image.
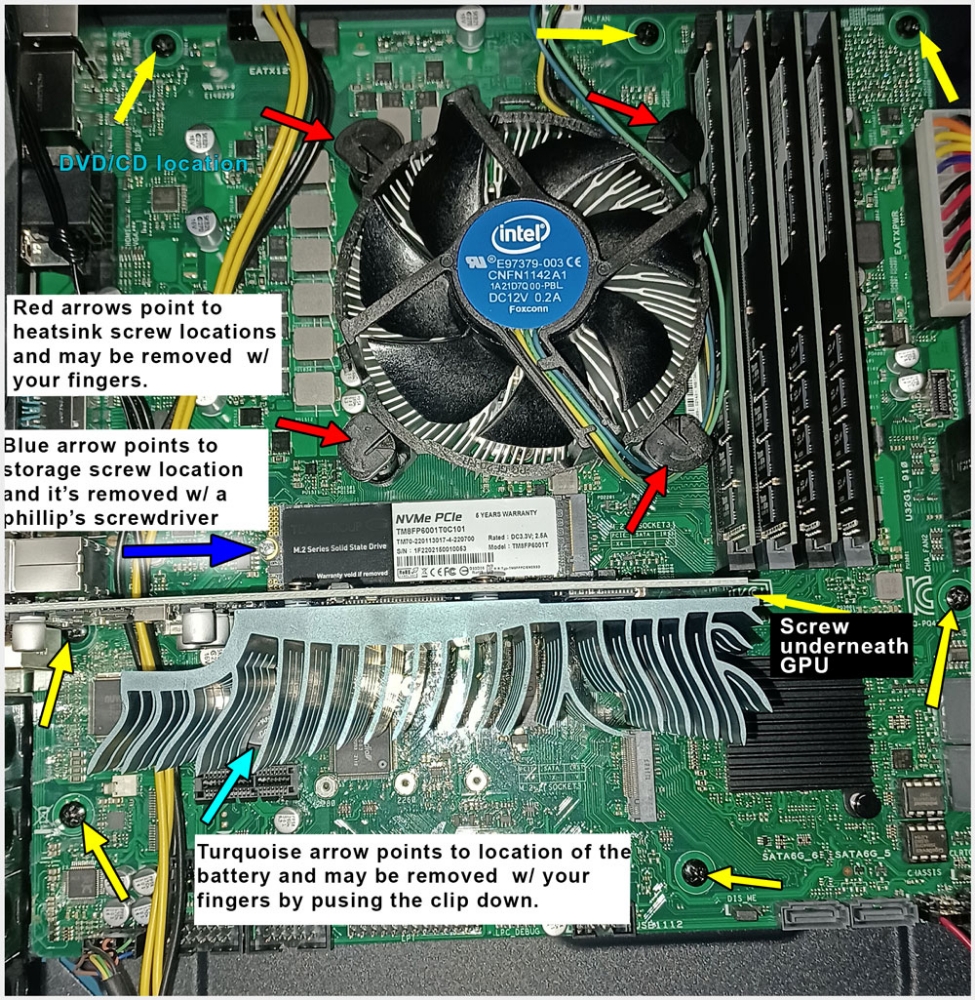
Yellow arrows point to motherboard screw locations. Screws are removed with Phillips screwdriver.
Follow component removal instructions as stated above in B2000S PC.
NOTE: CD/DVD (SCO-1050 & SCO-2050, Scorch Xtreme Workstation) contains PC board larger than 10cm^2.
Components for the Scorch Xtreme Workstation contains PC board larger than 10cm^2.
Components for the Scorch Xtreme Workstation are easily removed with a Phillips screwdriver, finger twist, pull latch up and away or a combination of the listed removal procedures. Several of the removal procedures are very similar when removing parts from the PC. A torque screwdriver will be needed to remove the heatsinks from the motherboard along with the CPU/s.